How to use Brightspace: The Basics


Guest Post by Laura Kerpel.
Why choose Brightspace?
At first glance, Brightspace seems more complicated than Google Classroom. So why would anyone choose it? I liked that it was bright and colourful, and could be icon-based for my primary students. But with its many features, Brightspace can be used from K-12. The great part about Brightspace is you can use all of the features, or just a few. You can always add more options as you and your students become more comfortable with the platform. Here are a few of my favourite features of Brightspace.
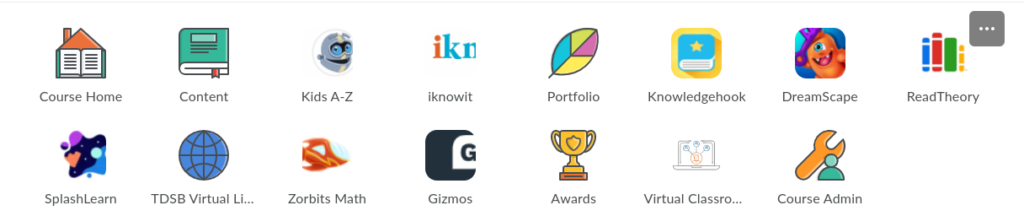
The Navigtion Bar
When I first introduced my students to Brightspace, I started slowly with just a few links to sites that they were familiar with. I posted these in the Navigation Bar. I added more over time as they became used to this feature. The three dots allows you to customize the bar by removing or adding links.
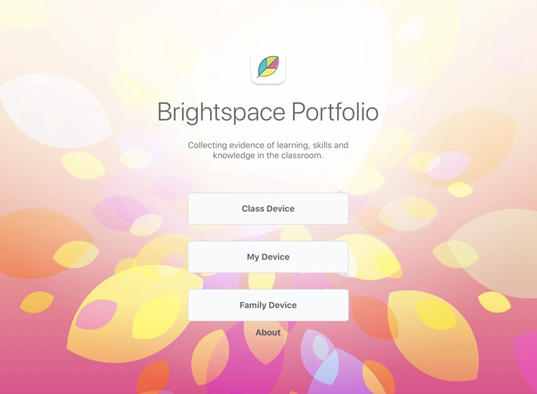
Portfolio
Brightspace has two different portfolio options, one for younger students called Funster and one for older students. Students can capture evidence of their learning by scanning a QR code. This can be done at school or at home and is an easy way for students to share their learning with their teacher.
Announcements
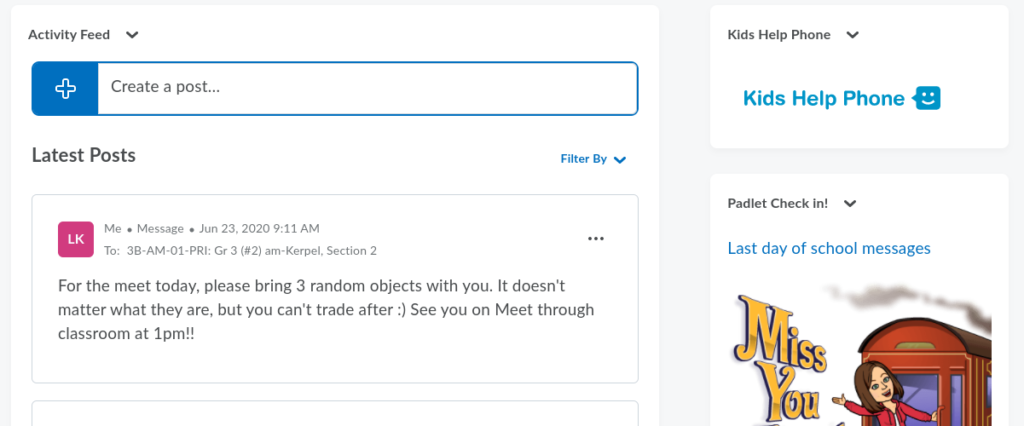
The homepage allows you to choose different layouts so you can customize it to your liking. I used mine to have an activity feed on the left and widgets on the right-hand side. Each day I did a Padlet attendance check-in. So in this case, the widget was linked to an external tool where the students could answer a daily question. Widgets can also link to a Google Site!
Virtual Classroom
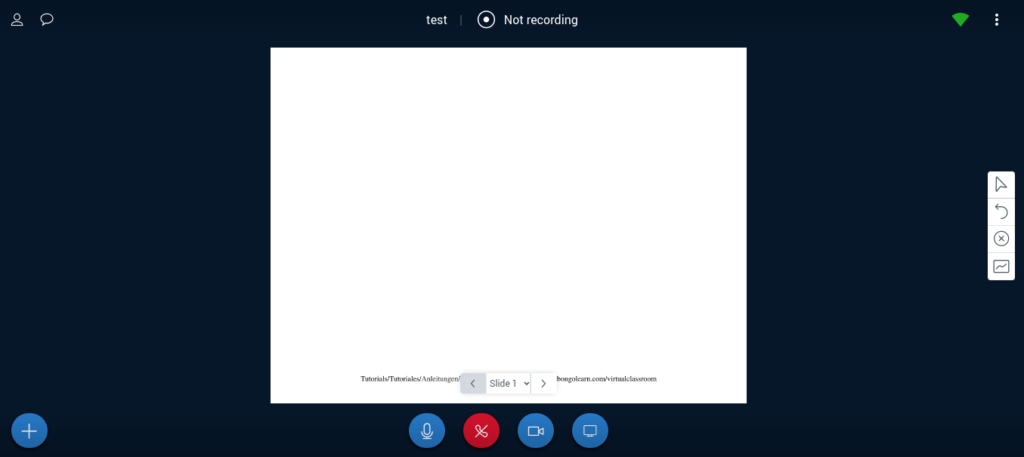
Brightspace has a built-in space for students to meet and collaborate. They can join by video or audio. Students can share the whiteboard in the middle. The teacher can use that space to share slides, questions, video…the sky’s the limit. There is also a feature for students to answer using thumbs up, down, and other emojis for a quick teacher check-in. My favourite part about the virtual classroom is the breakout rooms. The teacher can group students and each group has access to a collaborative whiteboard.
Content and Classwork
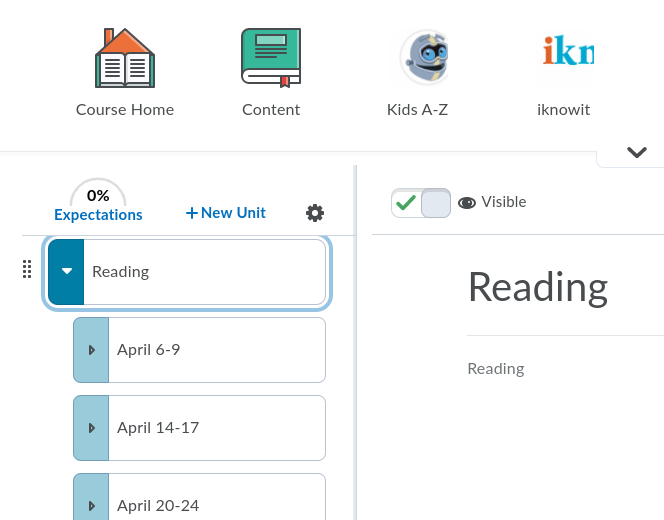
Brightspace has a built-in content section. They are like folders that hold the work for students. I had one for Writing, Reading, Math, etc. They can also be organized by week. Under each folder, you can add more folders if you like to be very organized!
Lessons
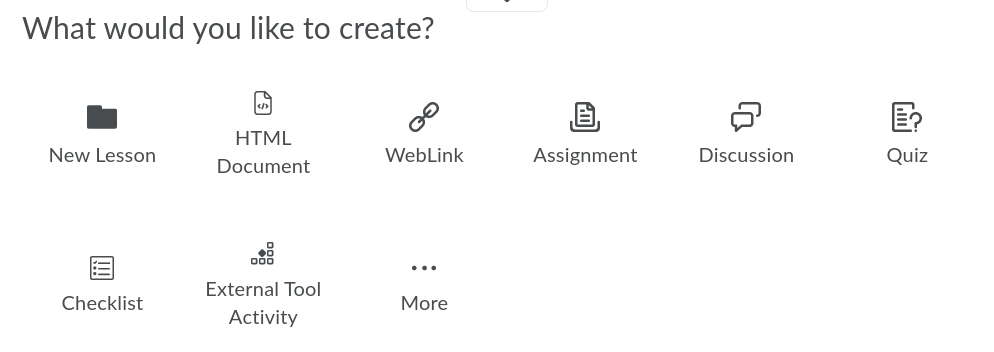
Under each content section, Brightspace gives you many options to share work with your students. You can add an assignment, a quiz, a discussion, or a WebLink to an external website. I used the HTML Document to add lessons, videos, choice boards, and content slides. You heard me right, I could add all of the content from G Suite into the Brightspace platform!! I used the assignment option when I wanted the students to submit something back to me.
Assignments
Assignments are a great feature in Brightspace. There is an easy to use rubric feature that you can customize and will even provide automatic feedback. A student’s grade will load into the built-in Grade Book. When a student submits an assignment, you can see a preview on your screen. Brightspace has a built-in annotation feature so you can mark the work right in Brightspace. The right-hand menu lets you access the rubric and provide feedback. The feedback can be in the form of a file, text, picture, or you can record video or audio feedback for the student. Imagine the possibilities! Then you can go straight to the next submission for easy and fast marking. The Assignments tool also allows you to check student submissions using Turnitin. Definitely helpful for teachers of older students! You can see all this in more detail in the video below (next section!).
How to add an assignment
This option is when you want to add an assignment where the students can submit a file back to you. Follow the steps above to ‘create new’, but this time choose assignment. You can decide what type of assignment you want the students to submit. I chose “file submission” most often. You can then add a title and have the option to add a description of the assignment for your students. Your assignment is then created, but you have the option to go to the assignment and edit it to add more options. This is where you can add a rubric, feedback files, change the score that it is out of, etc.

Here is a video with more detail:
You can also view more videos on how to add pdfs (and make them “digital), in {THIS POST}.
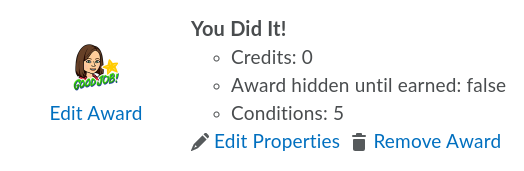
Awards and badges
So your students have done all of this great work, now what? Send them a certificate or a badge! You can use the badges and certificates already there or you can create your own. You can issue these awards or you can have Brightspace release them for you using the Content Release feature.
Many more features to explore
One of the features I used a lot was the Classlist. It allowed me to see who was currently online and the last time they had accessed Brightspace. The student numbers were listed as well. There is an instant message option and a built-in email tool. The student emails were populated in the class list as well as the option to email their parents! This was definitely so handy during distance learning! The emails were also sent to my board account so I was able to receive a message even when not logged into Brightspace.
A feature that makes Brightspace nice, is the option to view Brightspace as a student. So when you upload a lesson or assignment, you can see what the student would see. You can also impersonate a student. I used this occasionally when a student said a link wasn’t working for them or they were having trouble uploading a file.
There are many more options in Brightspace as well. You can add expectations, competencies, create sections to allow for IEPs and other modifications, the list goes on. But remember, the complexity is up to you. Start with just an announcement feed and links in your navigation bar. Slowly start adding content and assignments. Use the features you want, hide the features you don’t 🙂 Whether it is for synchronous or asynchronous learning, we can do this!
About Laura:
A big thank you to Cinnamon’s Classroom for inviting me to write this post! My name is Laura Kerpel, and I am a primary teacher with the Toronto District School Board. I am also a Digital Lead Learner for the TDSB, which allows me to help teachers with the integration of technology into classrooms. I am passionate about using coding, robotics, and technology in the classroom, and I love to share it with whomever will listen 🙂